Setting a Global Header Using Header Builder
To configure a global header for your website:
- Go to your WordPress Dashboard.
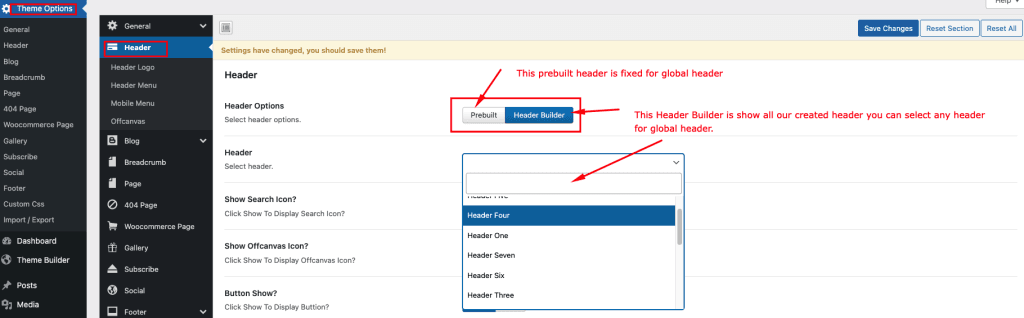
- Navigate to Plumer Options → Header.
- Click Header Builder.
- The Prebuilt option is a fixed default header.
- The Header Builder option allows you to choose from all the custom headers you have created.
- From the dropdown, select the header you want to use as your global header.
- Click Save Changes to apply your selection.
Notes for Users:
- Requirement: Use only the Header Builder.
- The Header Builder shows all available headers, giving you flexibility to switch the global header anytime.
- Ensure you save changes after selecting your desired header to make it active across the site.
Changing Header for a Specific Page
- Go to Dashboard.
- Navigate to Pages → All Pages
- Click Edit on the page you want to modify, then select Edit with Elementor.
- Click the Settings icon
- In Page Layout, select “Template Builder“.
- Under Header Option, choose Header Builder Option, then select the desired header.
- Click Publish to save your changes.


Edit Header Builder Content
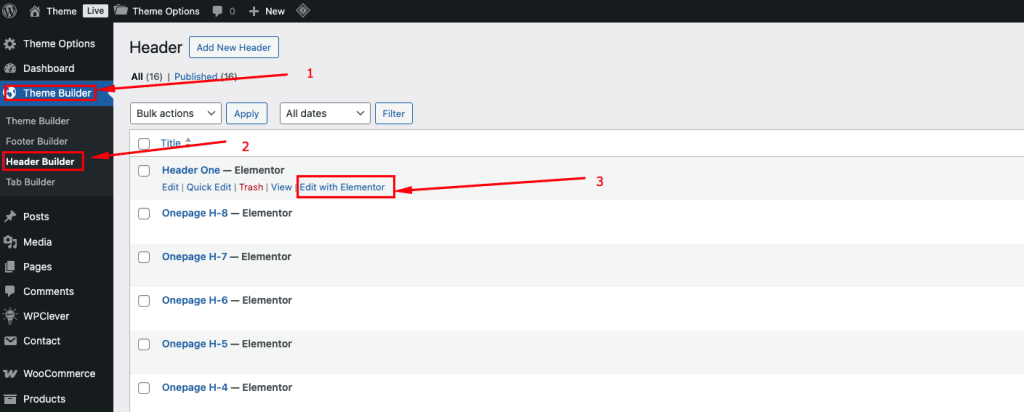
- Go to your WordPress Dashboard.
- Navigate to Plumer Builder → Header Builder.
- Click Header Builder – Show All Created Header to see a list of all existing footers.
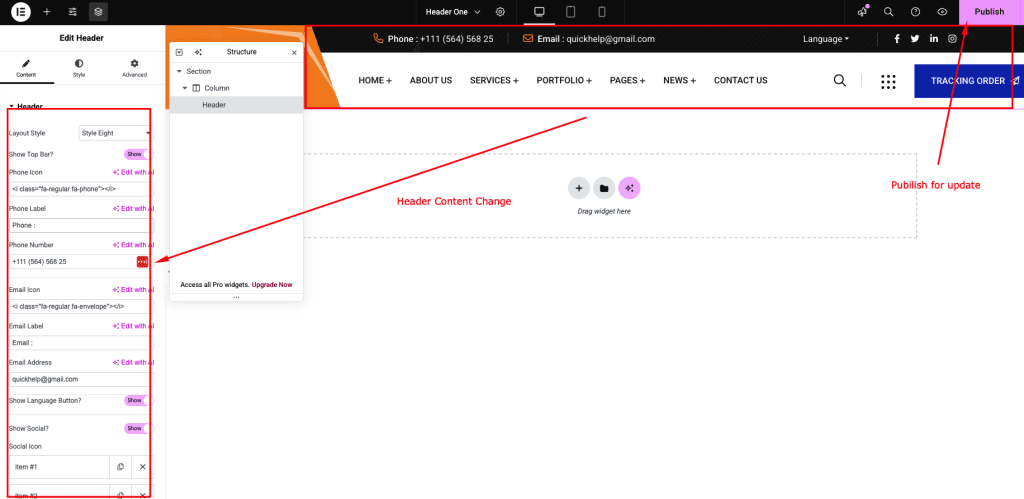
- Click Edit on the Header you want to modify, then select Edit with Elementor.
- Click Publish to Save Changes.
Edit Prebuilt Header Content
- Go to your WordPress Dashboard.
- Navigate to Plumer Options → Header
- Change header all Content
- Save Changes

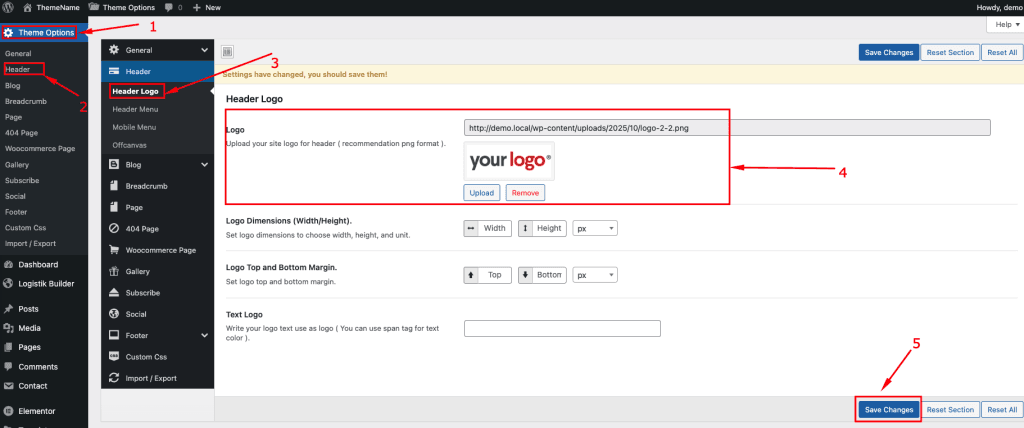
Prebuilt Header Logo Change
Navigate to Plumer Options → Header → Header Logo
Prebuilt Header menu icon show/hide and color change
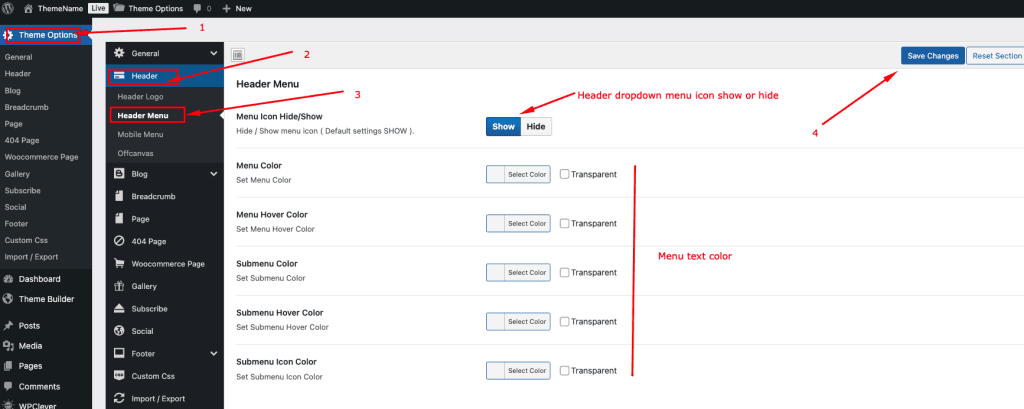
Navigate to Plumer Options → Header → Header Menu